Monday, February 25, 2008

Sound Bar for the Flat Screen Tee Vee

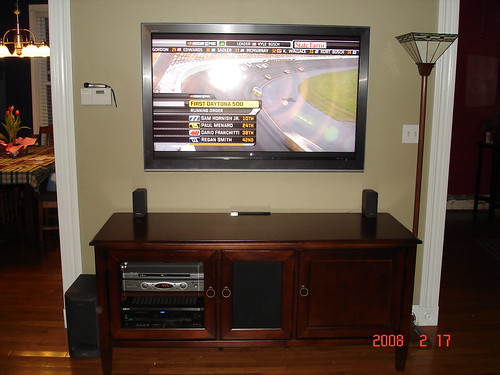
I purchased a 52" Sony LCD the other day and mounted it on the wall. You can see in the picture below, I had a pair of left and right speakers on the stand (center hidden in the stand) but of course it didn't look clean once the tv was on the wall.

I looked all over the web for a set of speakers that would mount to the wall and flank the tv. The prices for speakers like that cost more than my Sony receiver! I also began searching for what they call a speaker bar that sits under the tv and has a left, right, center & surround all in one unit. Those were even more expensive. So what did I do?


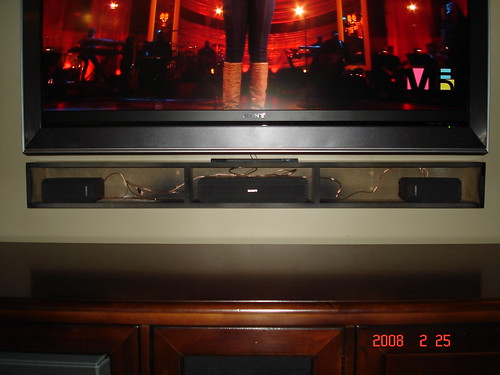
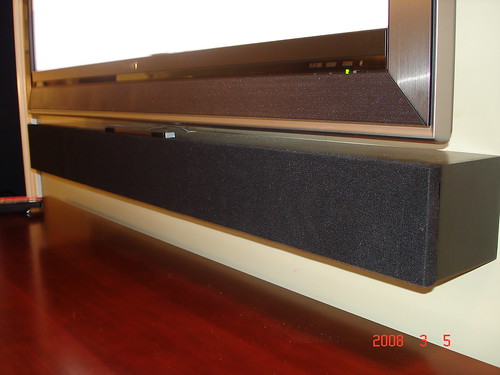
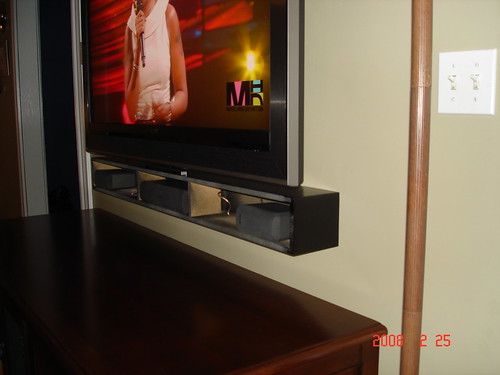
I built one out of 1/2" MDF. It is the same length and depth of the tv. I'm still waiting for my speaker cloth to come in the mail. The existing speakers fit in there great. Once it's covered with a frame / speaker cloth, you'll never know the difference.

This was also my first time spray painting MDF. Once primed and then sprayed about 3 to 4 coats, the thing looks like glass.

The only thing I wish I would of done was angle the back corners to mimic the way the back of the tv is.

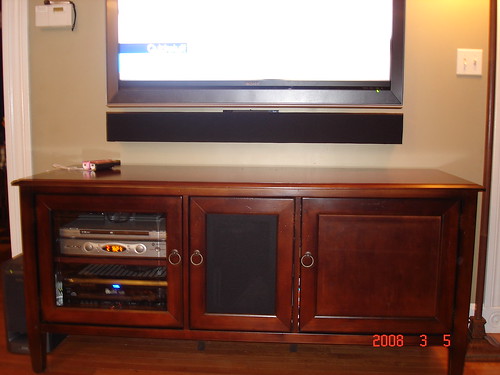
Here is the completed speaker bar with the cover installed.


More pictures located on Flickr

Labels: , , , ,

Tuesday, January 22, 2008

Magnetic Fish Tape

Surfing around some tool blog sites today and I come across this. I wonder how well it would work behind plaster and lathe?


"To use the Magnafish system, you drop the rare-earth magnet leader through a 7/8″ hole, then capture it with a paddle magnet. Move the paddle magnet toward the opening, then extract the leader and attach your cable or wire."

On a side note, I picked up a good tip from the comments section of Toolmongers post on this item. One guy uses a rare earth magnet to find those "lost" electrical junction boxes in the wall.

More information can be found here

Friday, January 18, 2008

Cutting Corners


The page that gets the most hits on my small blog has always been my "Make your own Rosettes". Toolmonger picked up the images out of my flickr account this week and made a post about it.

While surfing Toolmonger I saw a neat little tool to be able to round corners on wood without having to bust out the router all the time or sand, sand, sand. It's called a Cornering tool set.

This would work great for moulding and casing with it's sharp corners that do not take paint well, or any corner you need to round out to make it more comfortable to the touch. Check it out.

Sunday, November 19, 2006

Mr. Heater will be your buddy

With it getting colder in St. Louis recently and my workshop in the detached garage, I need to be able to stay warm. That's where my buddy comes in. Mr. Heater Buddy that is. Within about 20 minutes my 26 x 26 garage chill is knocked out and I can shed my coat and wear just a sweathshirt.


Mr. Heater uses 1lb camping propare cylinders or you can get the optional hose package to hook up to larger propane tanks.

It has a built-in blower fan can circulate heated air for enhanced heating efficiency when using it indoors. The fan operates on 4 x D-Cell batteries or with a 6 volt A/C adapter (not included).

Many safety features including: Low-Oxygen shut-off system, tip-over shut-off and heavy duty safety wire guard.

I purchased mine at Lowes, but they are avaiable from Amazon or other web stores.

Thursday, October 19, 2006

Heirloom Tools


I'd love to be able to hand tools like these down to my children. I have a tool box from my great-grandfather that he used to work on cars, but to have some wooodworking tools like this...

From This Old House
These are masterpieces of the toolmaker's art, patiently crafted from rare woods, gleaming bronze, and thick steel. Sure, they're meant to be used, but we think they're equally satisfying just to look at.

Tools of this caliber don't come cheap—you won't find a handmade level in the next aisel over from the putty knifes at the hardware store—but we're talking about legacy here. They have heirloom quality. - Tool Photos w/ discriptions


Tuesday, October 10, 2006

Housing Bust Posterboy?

Came across this very intersting blog about a could be/would be housing investor....

"I started investing in October 2005 and went full-time in January of this year (2006)
. This is after going to numerous real estate investing seminars, reading books and learning from other investors for the past 2 years. I did my first successful deal in October while still at my full time job. In January I quit my website programming job and went all out!

From October 2005 to May 2006 I bought 8 houses in 4 different states, mostly with the help of 100% stated income loans (liar loans). Most are fixers - I was going to rehab and flip each one within a month or so. Buying was easy, but man was I in for a surprise (or a lesson?)...."

He began to write a tell all blog about his adventures. Here is the reason why.

Monday, October 02, 2006

Cedar Fence

Cedar Fence

I recently helped a neighbor up the road construct a 180' long - 6' tall cedar fence at the edge of his property. All in all it was an good time and I always enjoy helping out at other peoples houses.

I think the hardest part was digging the fence posts. Along his property line, we encountered a lot of tree roots and concrete. Living in an established area means anything can be underground. The biggest item we pulled out was at the end of the fence line. It was a concrete section that was approx. 2' x 3' x 3' deep section. It must of been from an old firepit or garage at one time. Each picket has 6 screws attached to the 2 x 4 horizonal cross members. 6 * 160 = 960 My drill had a workout.

It was approx a three day job. One to dig and set the posts, one for the 2 x 4 cross members and the last day to set the pickets. It was his job to stain the fence with a clear stain.

More pictures can be seen on my Flickr Set