Saturday, September 23, 2006

Growing Tomatoes in the Gutter

It's true the gutter cleaner pulled out a small tomato plant out of the gutter. He said that birds sometimes drop the strangest things in gutters, like seeds and worms.

I had been neglecting my front gutters recently due to the fact that it's near my power line coming into the house. I really didn't need to get fried with my 40' extension ladder trying to manuever it around the power lines and my steep roof.


A quick search on the internets found a man a few blocks from the house that has been in the gutter cleaning, installation, maintance for the past twenty years. Just Gutters John over at Just Gutters came promptly and cleaned out my gutters and installed some simple ez-lock black coated gutter guards. He brought all his own gear (ladders, hoses, trash bags) and cleaned up very well.

It's been raining on and off since he left yesterday and the gutters are flowing just great.

So if you live in the St. Louis, Mo area and need any kind of gutter work done. Call John at Just Gutters

Saturday, September 16, 2006

Look Mom No Hoses

For the longest time, I wanted a cordless brad nailer. But I didn't want to shell out my hard earned cash for a fancy dewalt cordless nailer. Everytime I was at Lowes I'd eye a Black and Decker combo kit that had a 18v drill and 18v brad nailer for $199. I didn't really need another drill. I already had three cordless and one corded drill at my disposal.


Last week, I'm crusing the closeout table near the tool area and I spot the 18V Black and Decker Brad Nailer for $40. It was the display. Now since I already had a few B&D 18v tools, I didn't need the battery. It was payday and I had a few bucks burning in my pocket.

It's not a bad product for the small jobs. (Making wall frames, tacking small mouldings like window stop, fastening wood when gluing up, etc...) It can accept 18 gauge nails up to 2" and can shoot 500 times under a full charge. I don't know about the 12v version they have. But the 18V works great for those times you really don't want to drag out the compressor and hose for a few nails.


Tuesday, September 12, 2006

How to make a Rosette

In my last post, I said I was going to show a tutorial on how I save money making my own rosettes.

Normaly rosettes are approx 3 1/2" x 3 1/2" x 1". Normaly I glue up two layers of 3/4" poplar and plane them down to 1" thick, but you could glue up a 1/2" and a 3/4" pieces of (insert your choice of wood that can be stained or painted here" After the glue-up is complete and out of your clamps, I draw a line 3 1/2" parallel from the long edge as a refrence point and then true up an edge with my jointer. If you are using stock from your local big box store, and not rough lumber you can skip that step.


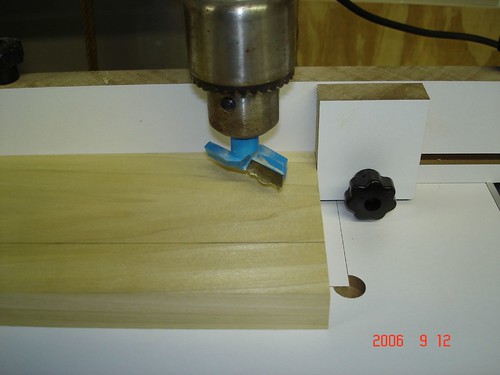
Next step is to set the rosette cutter in your drill press and center the bit with a stop block and rear fence. This really helps when you are making 20 of these at a time. Also a few test runs with the cutter to determine the stop depth of the drill press. It really makes making these a no brainer.


The next step is to mark and cut the board so that you end up with a 3 1/2" x 3 1/2" square section that you can take over to your router table to round over the edges with a round over bit with a bearing on top. Youc an prob use any edge profile you like, but I started with the roundover bit with my first batch of window casing installation.


Now your rosette is complete for staining or painting. I have a few other pictures of making the rosette on flickr If you want to see them.


Tuesday, September 05, 2006

I don't do windows, (But I do window casing)

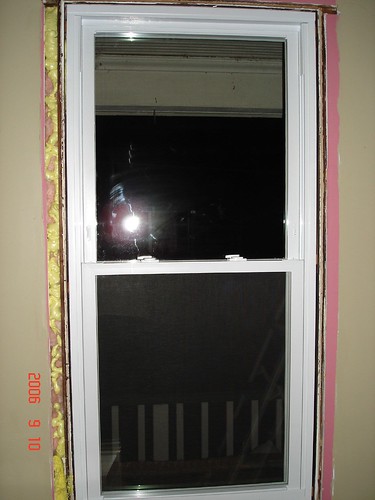
After spending a few weeks on the outside of the windows (read: scraping, heatgun, sanding, painting) gettting them ready for the new windows. I began to tackle the insides today. The previous owner decided not to shim up the 2 x 4's with lathe before installing drywall (nor insulating for that matter) This made my job 100 times harder. I had to glue an extra 1/2" to the edges of the new butterfly moulding so that when they sat on the window jam, it would sit up against the wall. One window down, 5 more to go. (on the first floor, 14 on the second floor still left to do)


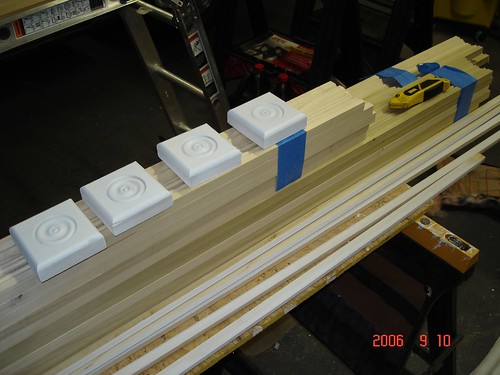
130 feet of new moulding and homemade inside window stop. No need to buy rosettes, when you can buy a cutter for your drill press. In a few days, I'll post a how to on making your own. (and save lots of dough doing it) Once you make about 5 or 6 of them, it's paid for it's self.


You can see the PO painted a nice pink on the walls, that had to go. The first thing I need to do is cut away into the old weight pockets to be able to stuff insulation. I wish they would sell the spray foam that contractors use. Those cans do not go very far. It's a lot easier to stuff regular insulation in the cavities.


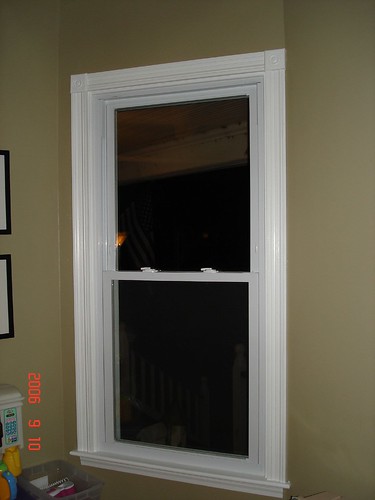
Finished product. New window sill, apron, window stops, rosettets and casing. Poplar sure paints up nice.